Fresh homegrown blackberries are one of the best parts of summer, and homemade jam is the perfect way to preserve their flavor to enjoy throughout the cooler months.

Come August, we are swimming in blackberries. They grow in abundance here on our property and I am always looking for new ways to preserve them. Freezing for winter smoothies and desserts along with water bath canning homemade jam are some of my favorite ways to use them up.
Blackberries are naturally high in pectin, so they are a great jam to make without additional store bought pectin. Most jam recipes use equal parts fruit and sugar, and in my opinion the result is an overly sweet jam. Any time I can jam I use low sugar recipes. All you need to make homemade blackberry jam is blackberries, some sugar, and I like to add in some fresh lemon juice to brighten the flavor.
We have both seedless and rather seedy blackberries here on our property and this jam recipe works with both. If I am using particularly seedy blackberries I like to process through a food mill or push through a fine mesh strainer for a smoother result.
How To Make Blackberry Jam Without Pectin
Add blackberries to a heavy bottom pot with sugar. Stir together and, optionally, allow to macerate for an hour until the sugar begins to dissolve.

Heat the blackberries and sugar over medium until the mixture begins to simmer, the blackberries start to breakdown and the sugar is fully dissolved.
To make a seedless blackberry jam, push the mixture through a fine mesh strainer or food mill to remove the seeds. Make sure to remove all of the pulp and juice, then transfer the mixture back to the pot.
Continue to simmer the jam over medium low for about 15 minutes, or until the jam has reached the gel stage. This can be tested by spooning a small amount of jam onto a cold plate. If it sets to a jam like gel texture, it is ready to jar up. If it doesn’t, continue simmering. A temperature of 220 F (104 C) is considered the gel stage, so this can also be confirmed with a food thermometer.
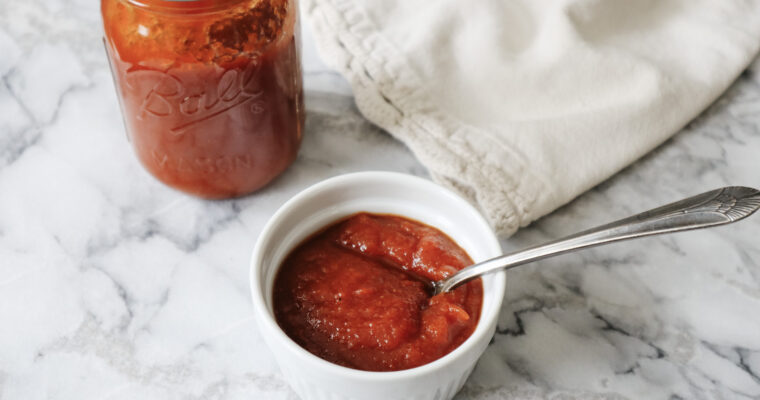
Ladle the jam into clean, hot 1/2 pint sized canning jars to 1/4 inch of headspace. Remove any air bubbles, clean the rims, and apply lids and rings to finger tip tight.
Transfer jars to a canning pot with a rack at the bottom. Make sure the water is fully covering the jars by 1-2 inches. Cover the pot and bring up to a boil. Once boiling, process for 10 minutes, adjusting processing time as needed based on elevation.
Remove jars from canning pot and allow to set at room temperature overnight. Remove rings, confirm jars sealed, clean and label. Home canned jam will last for years with a good seal, for best quality consume within 1 year.

Is It Safe To Can Jam At Home
Yes! Jam contains two high acid ingredients – fruit or berries and sugar. Blackberries actually do not need any additional sugar and can be water bath canned at home in just water. If you are new to canning you can test the PH of your home canned items with PH strips for peace of mind. A PH of below 4.6 is safe for water bath canning.
This recipe calls for fresh lemon juice. In this case the lemon juice is for flavor, not for safety so fresh can be used.
Tools & Ingredients Needed For Blackberry Jam
Canning Lids & Rings (Save 10% with code ABBEY10)
Blackberry Jam Without Pectin

Homemade blackberry jam is simple to make without pectin and the perfect way to enjoy blackberry flavor throughout the cooler months.
Ingredients
- 12 cups fresh or frozen blackberries
- 2 1/2 cups cane sugar
- 1/4 cup fresh lemon juice
Instructions
1. Add blackberries and sugar to a large pot and allow to macerate. This is optional but speeds up the cooking process.
2. Add lemon juice and heat over medium until berries have softened.
3. To make seedless jam, press through a fine mesh strainer or food mill.
4. Add berry mixture back to the pot and bring to a low boil, then simmer for 15-20 minutes until jam gels. This is at a temperature of 220 F or when a small amount spooned onto a cold plate gels up.
5. Fill 1/2 pint jars to 1/4 inch headspace. Clean rims, apply lids and rings to finger tip tight. Process in a waterbath canner for 10 minutes, adjusting as needed based on elevation.
More Canning Recipes
Home Canned Beef & Vegetable Soup
Pin It For Later