;

Author: abbeyverigin

One Bowl Gluten Free Pumpkin Muffins Recipe with Oat Flour

One Bowl Gluten Free Pumpkin Muffins Recipe with Oat Flour

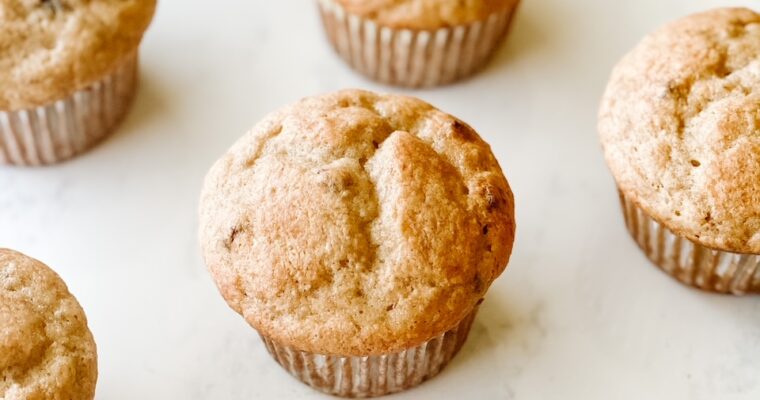
This delicious, fluffy gluten free pumpkin muffin recipe is made with oat flour, and refined sugar free with pure maple syrup. As a bonus, these one bowl muffins make for quick and easy clean up. It is fall, we are having some cooler temperatures which…
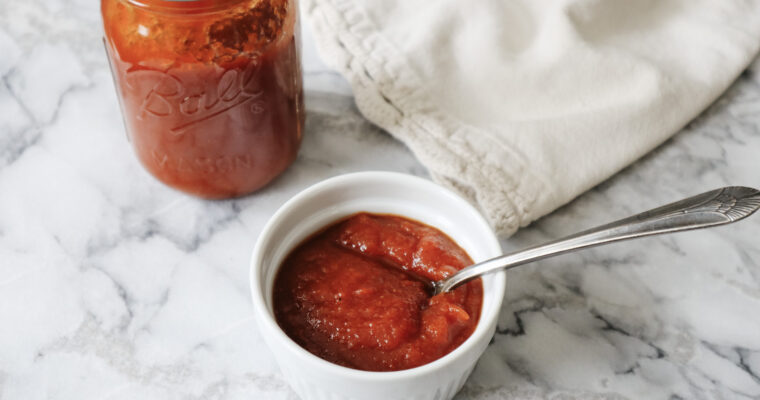
The Best Homemade Ketchup Recipe | How To Can Homemade Ketchup

The Best Homemade Ketchup Recipe | How To Can Homemade Ketchup

Homemade ketchup is easy to make and better for you without high fructose corn syrup. Learn how to can homemade ketchup with this recipe.

How To Make Homemade Marshmallows | High Protein Marshmallows With Egg Whites

How To Make Homemade Marshmallows | High Protein Marshmallows With Egg Whites

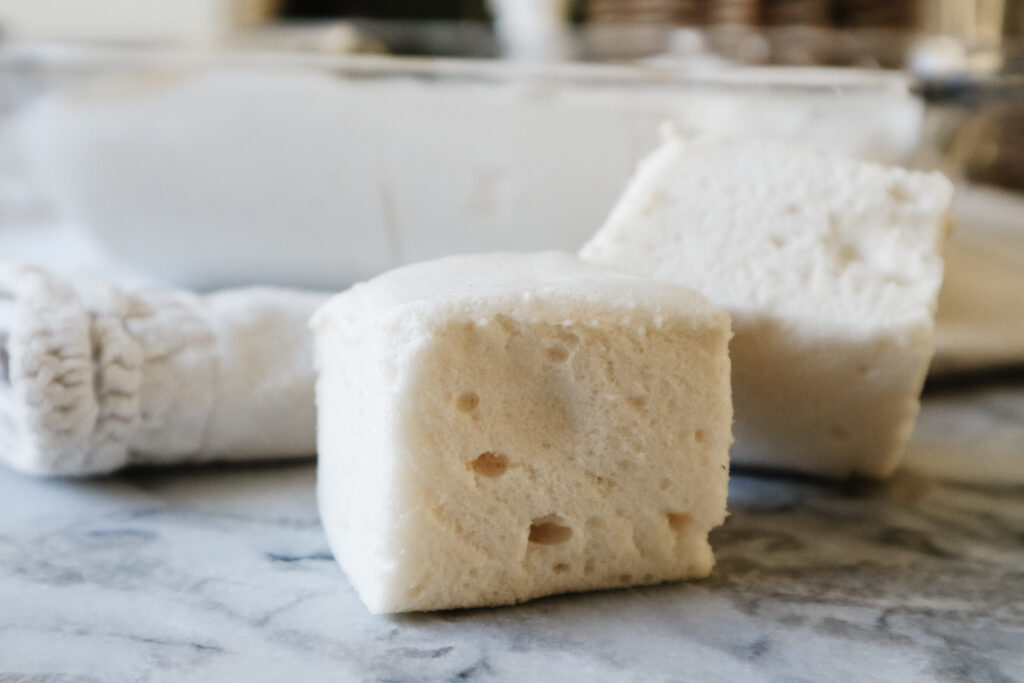
This homemade marshmallow recipe is made with egg whites for extra protein and is the perfect addition to hot chocolate or coffee. These fluffy homemade marshmallows are a healthier alternative to store bought options.

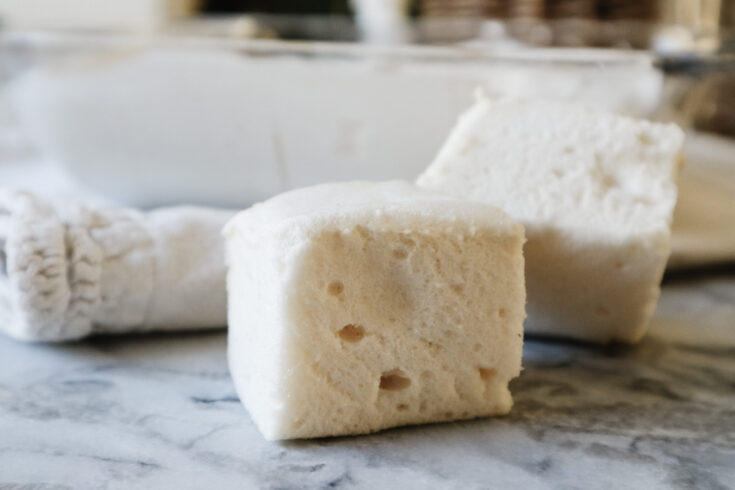
fluffy marshmallows

Marshmallows are delicious, but most options at the store are packed full of high fructose corn syrup. Marshmallows are easy to make at home for a delicious treat that are nourishing and have gut healing benefits.

Now, I have made homemade marshmallows many ways before. I even have a recipe for paleo honey marshmallows that are made with just three ingredients. I knew I also had to share my recipe for high protein marshmallows. These are a favorite of mine because they contain less sugar and the addition of egg whites increases the protein. Pairing protein with carbohydrates is important to maintain stable blood sugar.

What You Need To Make Homemade Marshmallows

These high protein marshmallows only require a few ingredients. Water, gelatin, sweetener of choice, egg whites, vanilla extract and salt.

Water: Water is needed to bloom the gelatin.

Gelatin: My favorite gelatin is bovine gelatin. It is important to me to purchase a good quality grass fed gelatin and this company tests for glyphosate residue which I appreciate.

Sweetener: You can use many different sweeteners to make marshmallows. Make this recipe with cane sugar, maple syrup, or honey. All have been tested and turn out perfectly.

Egg Whites: I use egg whites in this recipe to increase the protein and use up egg whites. I make this recipe because it is a great way to use egg whites leftover when I have been baking with egg yolks.

Vanilla Extract: Vanilla extract adds a great flavor to the homemade marshmallows.

Salt: Add a bit of salt to my homemade marshmallows to balance the sweetness, but you can omit it if you like.

Are Homemade Marshmallows Healthy

Yes homemade marshmallows can be healthy. Homemade marshmallows contain gelatin which is a good source of glycine, proline, and glutamic acid, which converts to glutamine in the body. Glutamine is particularly important for those dealing with leaky gut and it is supportive of gut health. It is common for our diets to lack these amino acids.

Can I Make Substitutions With Homemade Marshmallows

These high protein marshmallows have a short ingredient list, so there isn’t a lot of room for substitutions, but there are some you can make! Make this marshmallow recipe with cane sugar, honey, or maple syrup. Change up the flavor by using different extracts like peppermint and spices.

Variations For Homemade Marshmallows

For chocolate marshmallows, simply add a tablespoon of cocoa powder with the sugar to the gelatin mixture.

To make chocolate peppermint marshmallows, add a tablespoon of cocoa powder with the sugar to the gelatin mixture and substitute peppermint extract in place of the vanilla extract.

Make cinnamon marshmallows by adding 3/4 teaspoon of cinnamon with the sugar to the gelatin mixture.

Can You Roast Egg White Marshmallows

You can roast homemade marshmallows, but these marshmallows melt faster because they use egg whites. I recommend trying my marshmallow recipe without egg whites for roasting, which you can find here.

How To Make Homemade Marshmallows

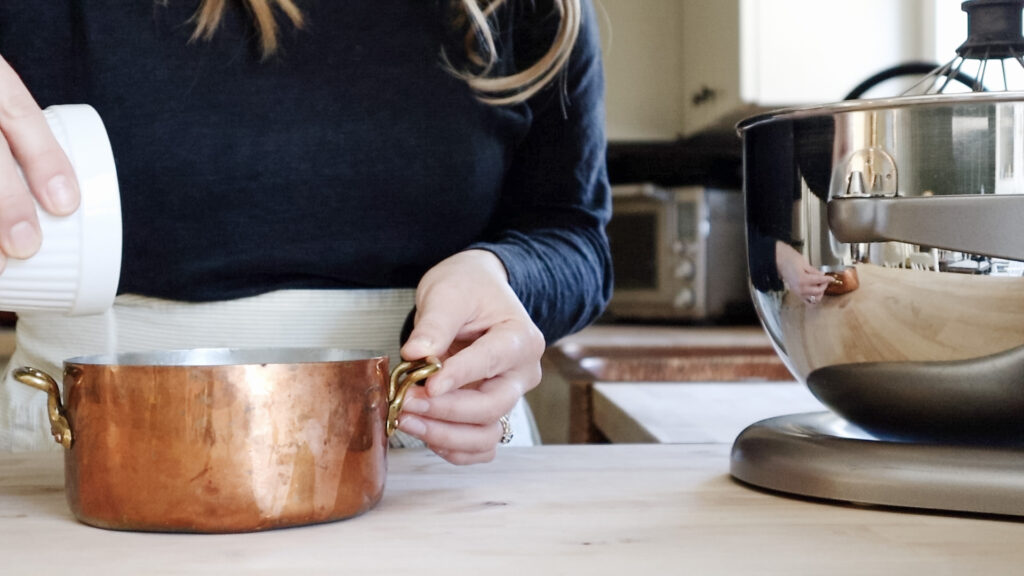
Start by adding the water to a small pot and sprinkling the gelatin over top, and then allow the gelatin to bloom for 5 minutes.

blooming gelatin for marshmallows

Once the gelatin has bloomed, heat over medium and add the sweetener, vanilla extract, and salt. Allow to simmer for a few minutes.

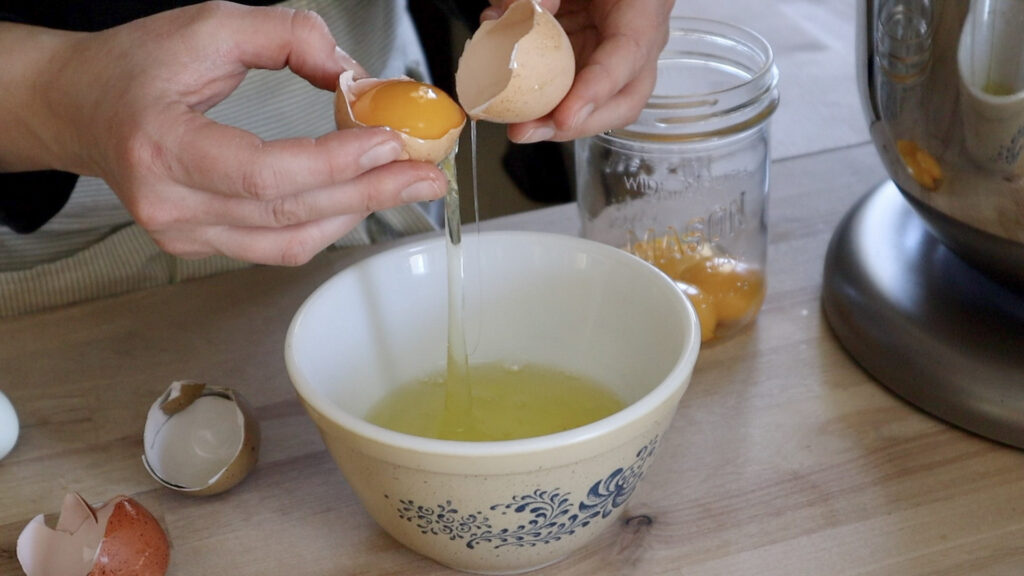
separating egg whites and yolks

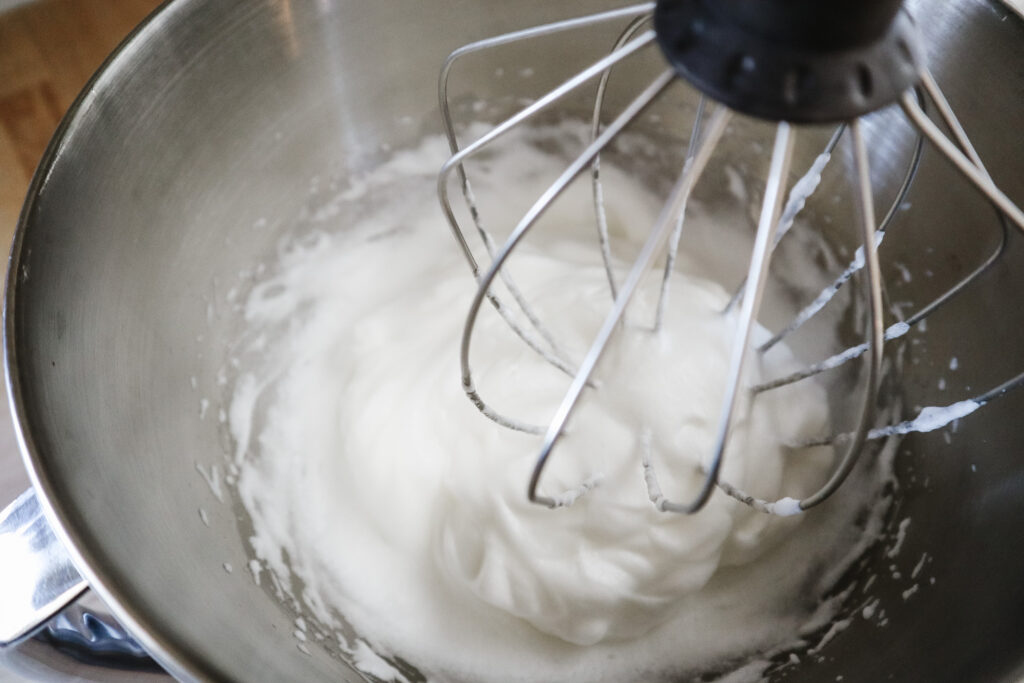
While the gelatin mixture is simmering, separate 6 egg whites and beat with a handheld mixer or in a stand mixer on high speed until stiff peaks form.

egg whites with stiff peaks

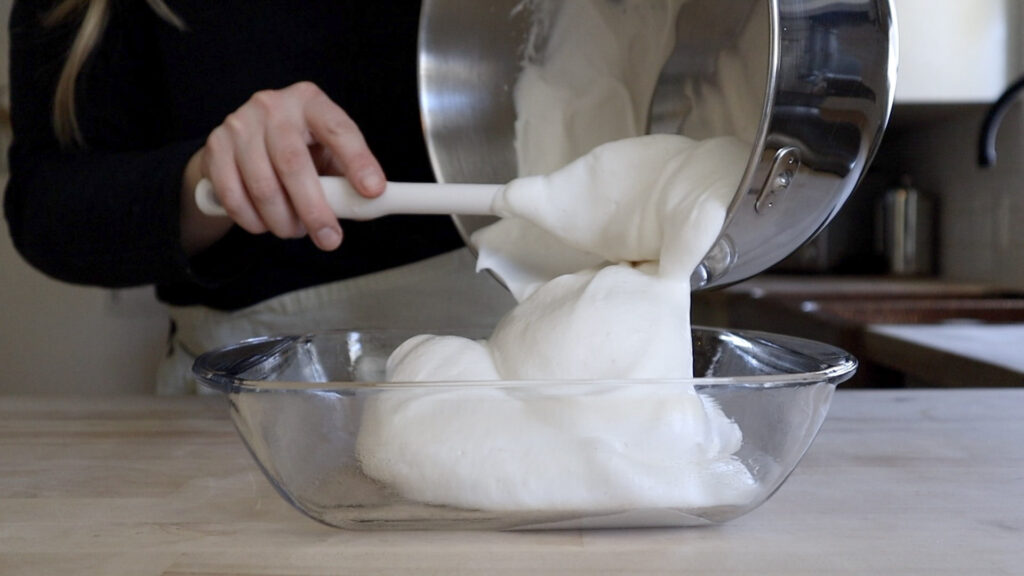
Slowly pour the gelatin mixture into the egg whites while mixing on high speed. Increase speed to high and continue to mix for one minute until the mixture looks thick and glossy. Grease or line a 8×8 pan with parchment paper and transfer the marshmallow mixture to the pan.

pouring marshmallows into glass baking dish

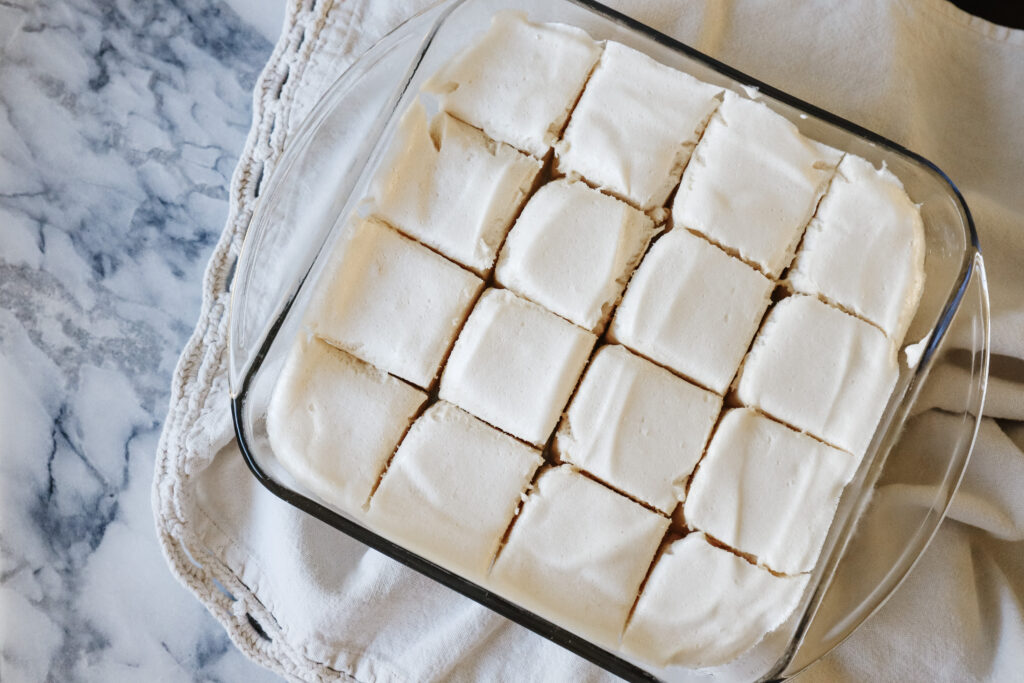
Smooth out mixture and allow to set in the fridge for at least 6 hours or over night, then slice into squares and serve.

marshmallows in a glass baking dish

Store egg white marshmallows in the fridge for up to 4 days.

Yield: 16

Homemade Marshmallows

homemade fluffy marshmallows

Homemade fluffy marshmallows made with egg whites for a higher protein option.

Prep Time 10 minutes
Additional Time 6 hours
Total Time 6 hours 10 minutes

Ingredients

  • 1/2 cup water
  • 3 tbsp gelatin
  • 6 egg whites
  • 1/2 cup cane sugar, honey or maple syrup
  • 1 tbsp vanilla extract
  • pinch of salt

Instructions

  1. Add water to a small pot and sprinkle gelatin over top in an even layer. Allow to bloom for 5 minutes.
  2. Heat gelatin mixture over medium and add sweetener of choice, vanilla extract and salt. Simmer for 3 minutes.
  3. Add egg whites to a stand mixer or use a handheld mixter to beat until stiff peaks form.
  4. Slowly pour the gelatin mixture into the egg whites while mixing on low speed.
  5. Increase speed on mixer to high and beat for 30 seconds or until the mixture has increased in volume and looks glossy and white.
  6. Transfer to a greased or parchment lined 8x8 pan and smooth out.
  7. Allow the marshmallows to set in the fridge for at least 6 hours or overnight before cutting.
  8. Store in the fridge for up to 4 days.

Other Posts Similar To Homemade Marshmallows

Honey Marshmallows

Shop This Post

Gelatin

Stand Mixer

Glass Baking Dish

Pin It For Later

Homemade Marshmallow Recipe #eggwhitemarshmallows #homemademarshmallows #highproteinmarshmallows #marshmallowrecipe #healthymarshmallows
How To Switch To Clean Beauty | Non-Toxic Beauty

How To Switch To Clean Beauty | Non-Toxic Beauty

Learn how to switch to clean beauty, and why the products we use on our skin is so important. Beauty products are often filled with endocrine disruptors, known carcinogens, and other harmful chemicals that can be disruptive to our health. This post contains affiliate links,…

One Bowl Gluten Free Banana Muffins With Oat Flour

One Bowl Gluten Free Banana Muffins With Oat Flour

The best fluffy gluten free banana muffins made in one bowl. These oat flour muffins can easily be made into a loaf of banana bread. This recipe is naturally gluten free and will be your new go-to recipe. This post contains affiliate links, which means…

Gluten Free Oat Flour Sandwich Bread Recipe

Gluten Free Oat Flour Sandwich Bread Recipe

This gluten free oat flour sandwich bread recipe will be your new go-to gluten free recipe. With just a few simple ingredients you will have a loaf of bread ready to go in less than an hour.

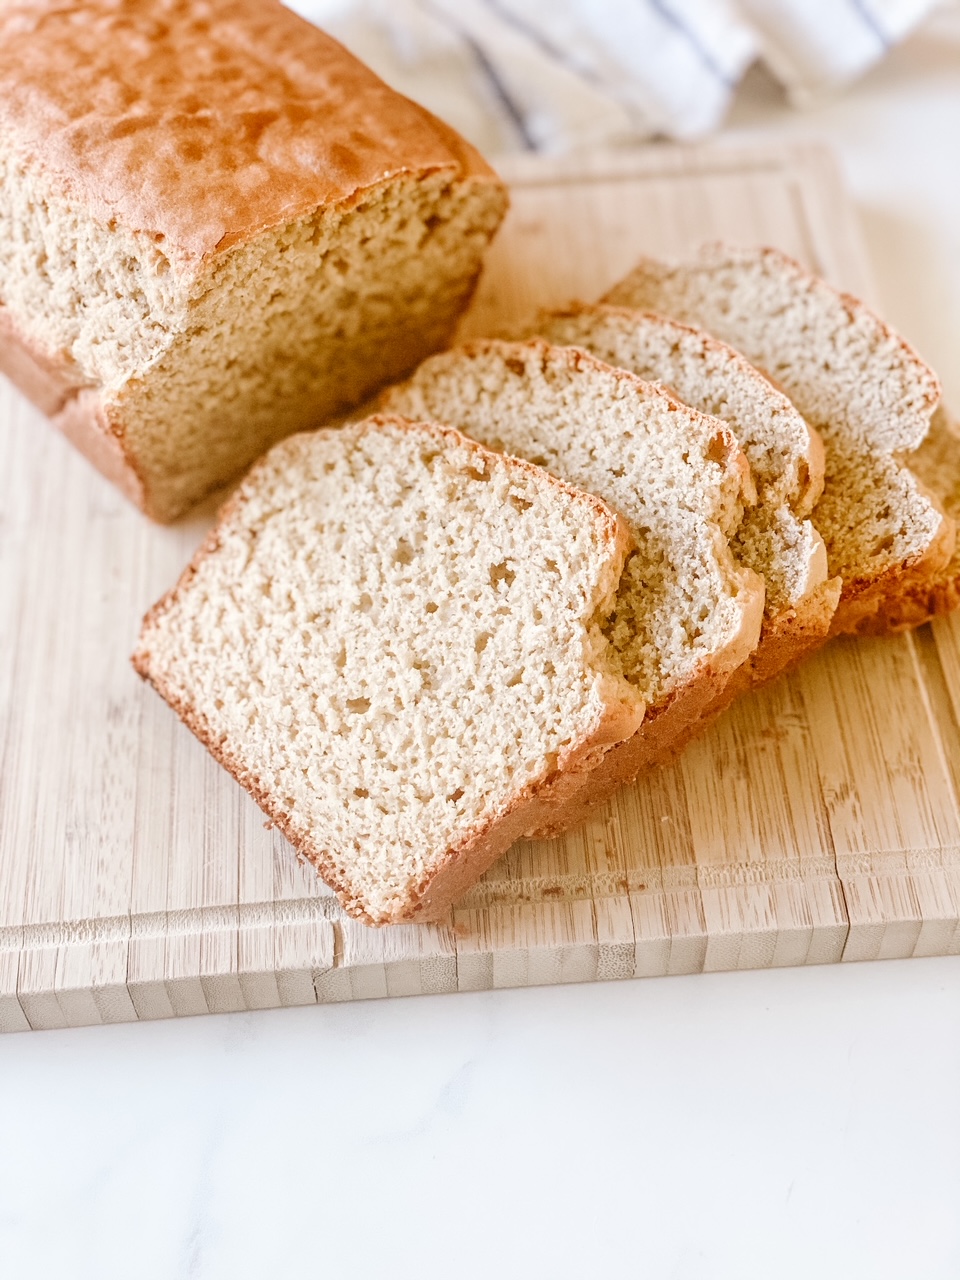
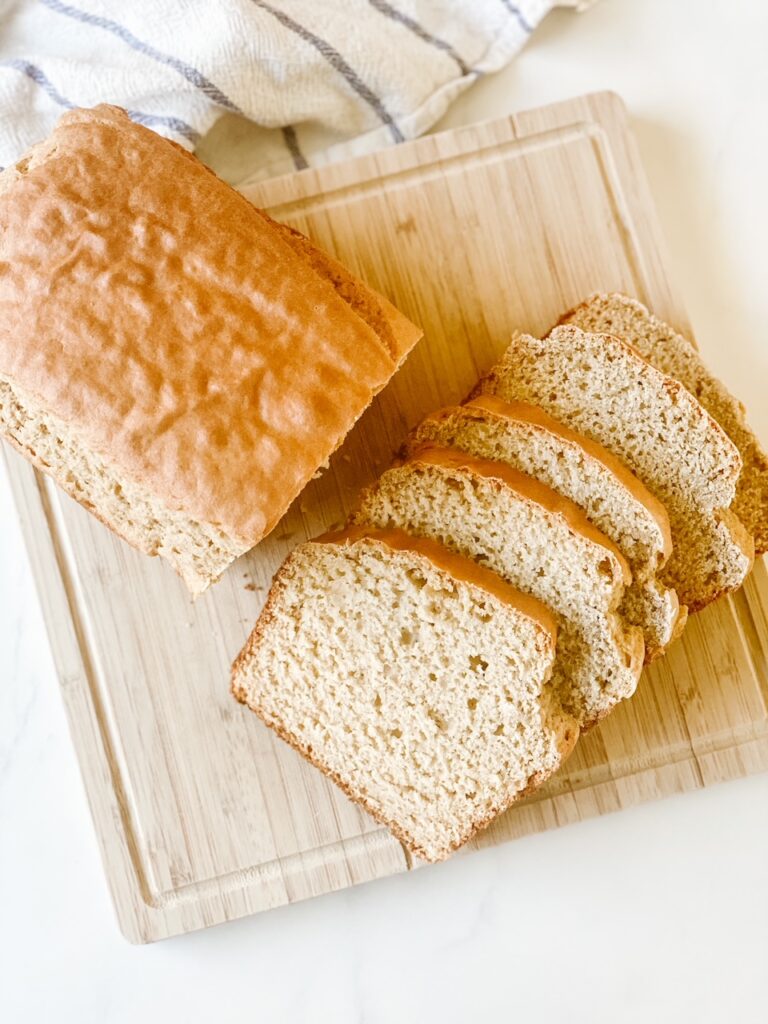
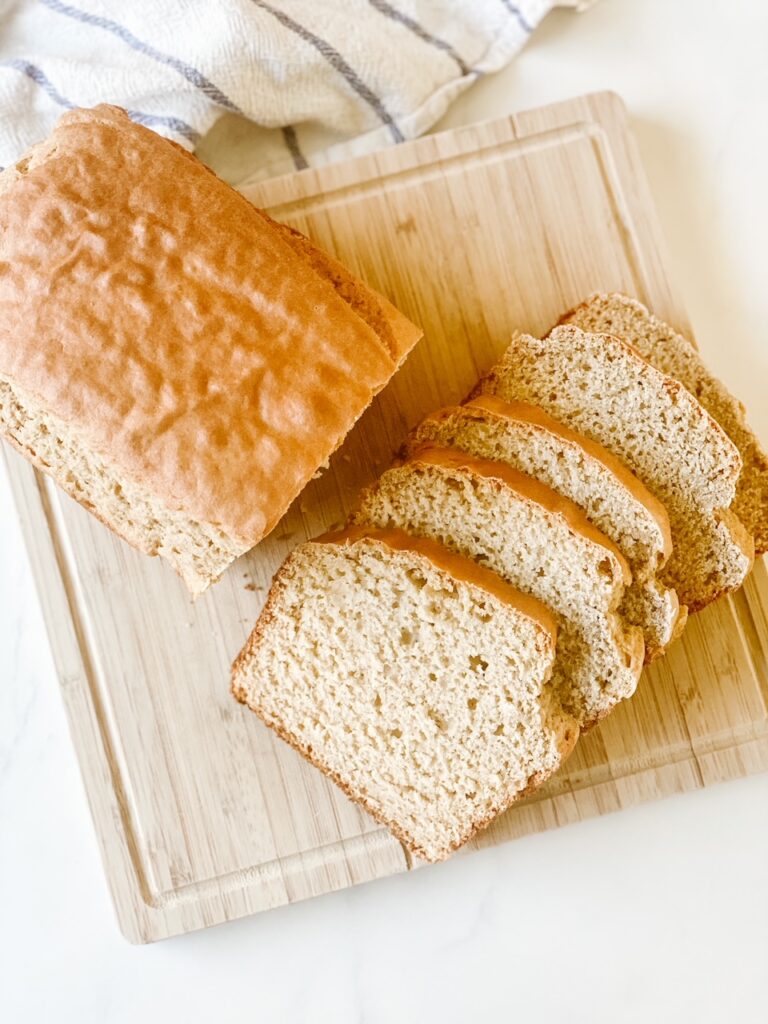
overhead shot of half of a loaf of gluten free bread sliced on a wood cutting board with a marble backdrop and white and blue dish cloth

As an Amazon Associate I make a small commission at no extra cost to you. See my full disclosure here.

It is hard to find gluten free bread that tastes great in store, plus they usually have a very long ingredient list filled with things I would rather not consume on a day to day basis. When it comes to home baked bread, it can still be hard to get good results.

Typically, gluten free bread contains some kind of gum to help the dough together. These gums can be very irritating to the gut, and I personally prefer not to use them. Without the gluten something needs to be added specifically to help with binding. I prefer to use eggs.

As for flours, oat flour is always my go to. This recipes uses oat flour only.

Why I Bake With Oat Flour

Oat flour is my go to gluten free flour for many reasons. I find it is extremely versatile and bakes up much better than most other gluten free flours.

Store bought gluten free flour blends are made to act as closely to regular all purpose flour as possible. This takes blending several different flours, starches, and usually some sort of gum. Personally, there is a lot I don’t love about them and I try to avoid gums. They often contain ingredients that I am not a fan of, they are expensive, and it’s hard to find one that is organic.

Oat flour is easy to make at home in under a minute. I always have oats on hand, so knowing that I can throw them into a high speed blender and have flour almost instantly is a game changer when it comes to gluten free baking.

There always seems to be some confusion on whether or not oats are gluten free. Naturally, oats are gluten free, however they are typically processed in the same facility as wheat. It is important to buy certified gluten free oats if you are celiac.

Tips For Making Gluten Free Oat Flour Bread

  • This bread will be more of a batter consistency than a dough. Technically this is considered a quick bread. The batter will be poured into your loaf pan instead of being formed into a loaf.
  • Line your loaf pan with parchment paper. This will make it much easier to transfer the baked loaf out of the pan. If you choose not to, grease your loaf pan well and
  • Allow the bread to cool as long as possible before slicing. The longer you can wait the better, as it will hold together much better if it cools completely before slicing. I like to bake a loaf in the evening so it can cool overnight.
  • If you would like to slice and use the gluten free bread right away before it cools, you can add 1/2 tsp of ground psyllium husk to the batter so it holds together well. I only use this occasionally as psyllium husk, like gums, can be irritating to the gut. This is a better choice than gums for us.

Can I Make Substitutions?

Because this recipe is gluten free and it uses oat flour only, there aren’t a whole lot of substitutions to be made. For a consistent result, I highly recommend sticking to the original recipe.

  • Use organic cane sugar or pure maple syrup in place of the honey.
  • Substitute 1 teaspoon of baking soda for the baking powder.
  • Use any milk – dairy or non-dairy.

Tools You May Need

Glass Mixing Bowl

Measuring Cups & Spoons

Whisk

Loaf Pan

Parchment Paper

How To Make Gluten Free Oat Flour Bread

Preheat the oven to 350 F.

If making your own oat flour, measure out 3 cups of gluten free rolled oats and add to a high speed blender. Start by blending on low, and increasing the speed to high. You are looking for a very fine, powdery flour. This should give you 2 3/4 cups of gluten free oat flour.

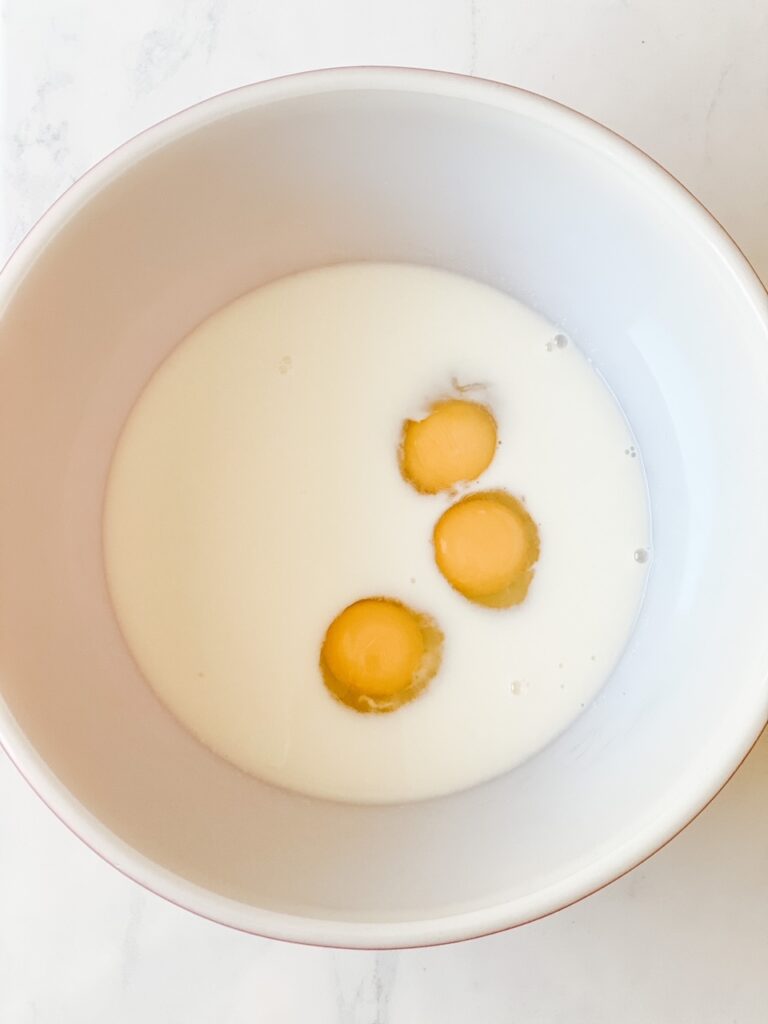
In a large bowl, whisk together the milk, eggs, and honey.

milk honey and eggs in a large red pyrex bowl

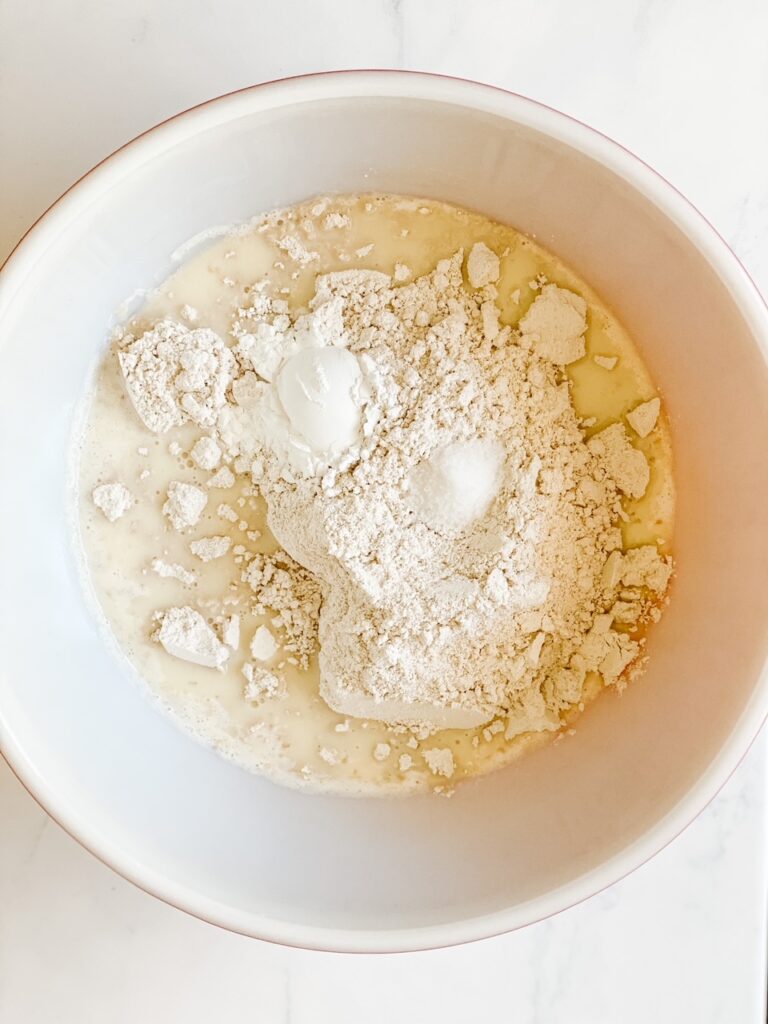
Measure out the oat flour and add the the mixing bowl. Whisk together. Add in the salt and baking powder and whisk again. If using psyllium husk, add it in this step.

mixing dry ingredients with the wet ingredients for oat flour quick bread

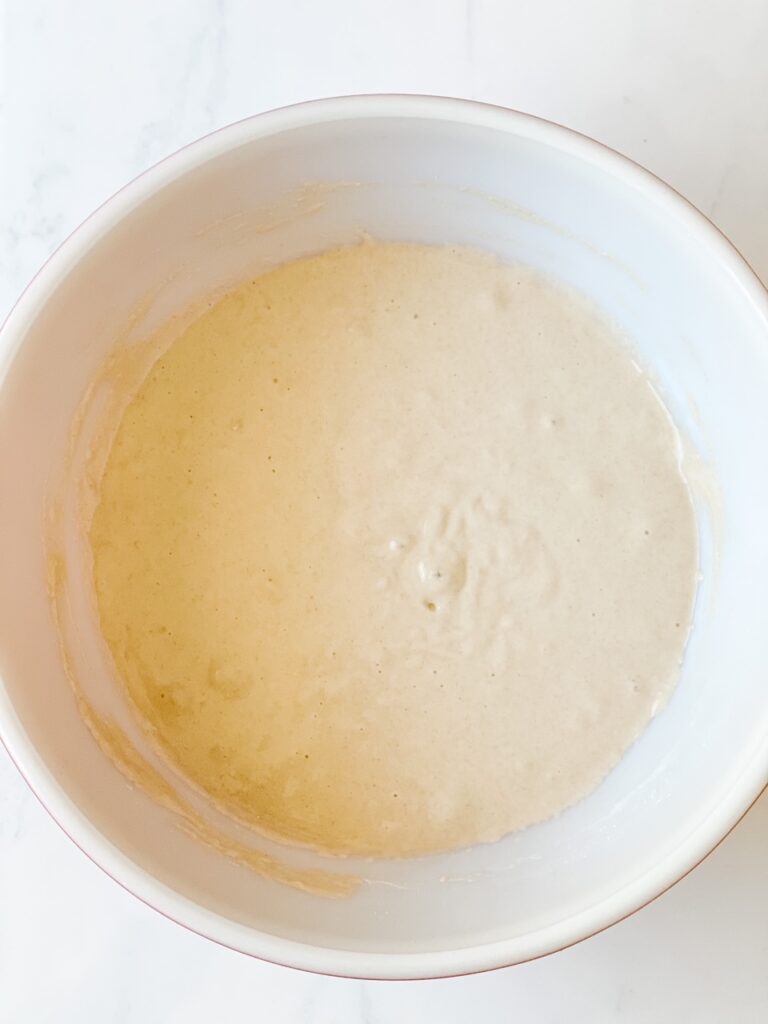
After mixing, you will have a batter consistency for the bread instead of a dough consistency you might be used to.

pyrex bowl with oat flour quick bread batter

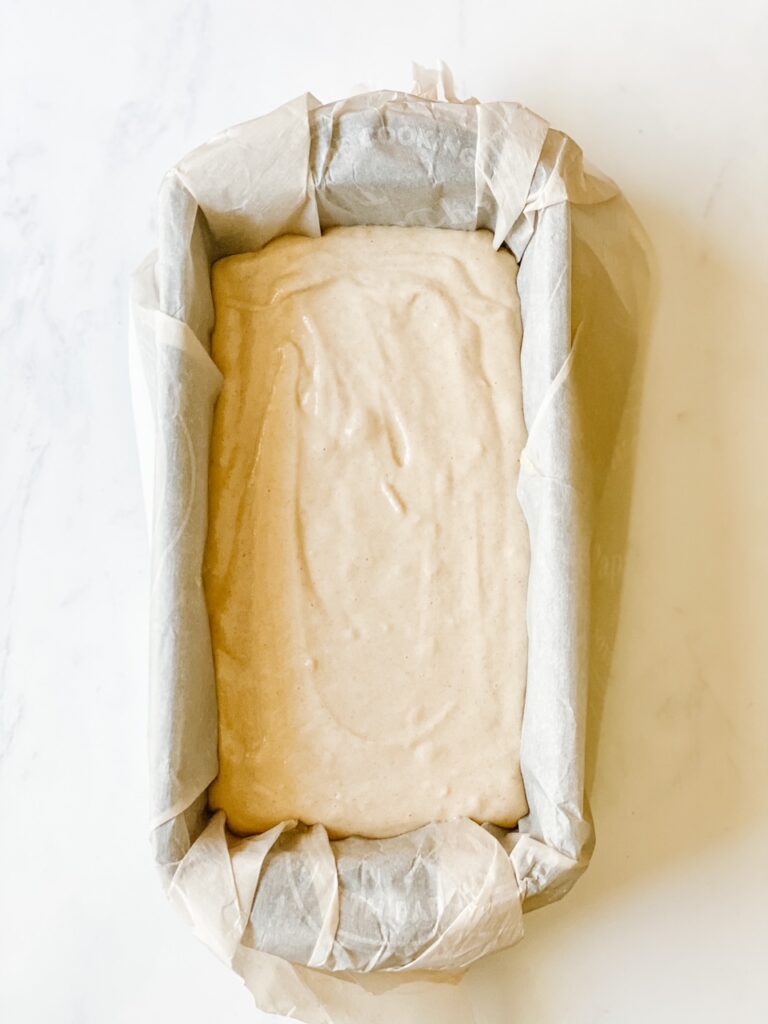
Line a loaf pan with parchment paper. Pour in the batter.

batter for gluten free bread poured into a parchment lined loaf pan

Bake for 45 minutes at 350 F.

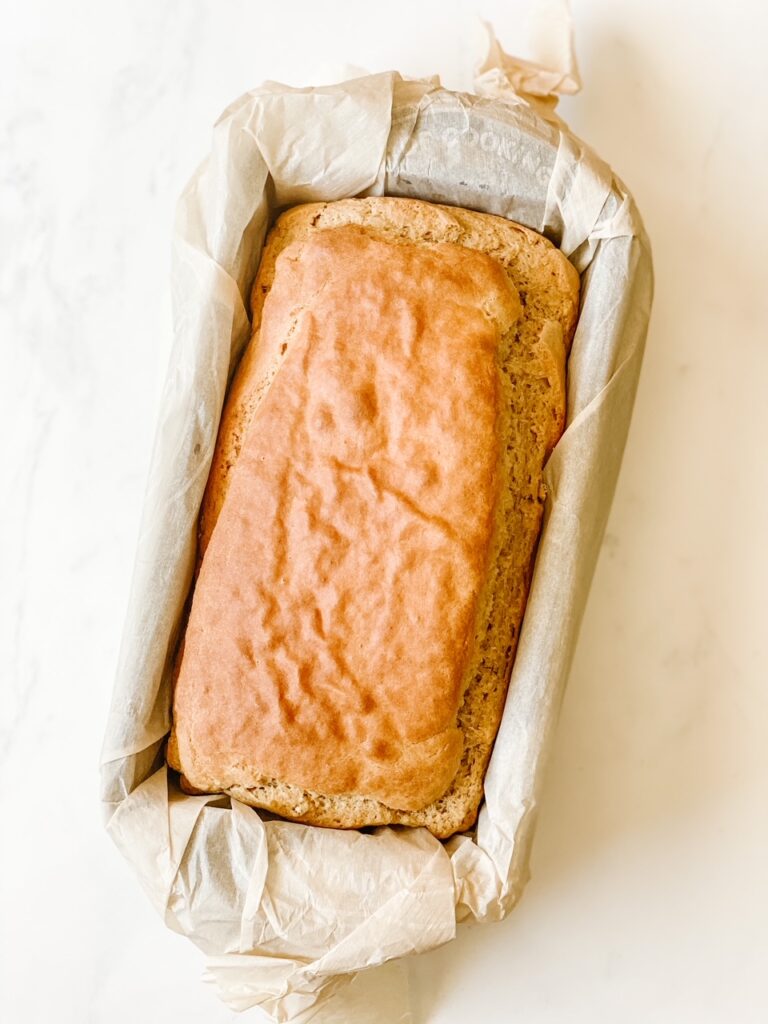
freshly baked loaf of oat flour bread in a parchment lined cast iron pan on a white backdrop

Cool completely before slicing. Overnight is best.

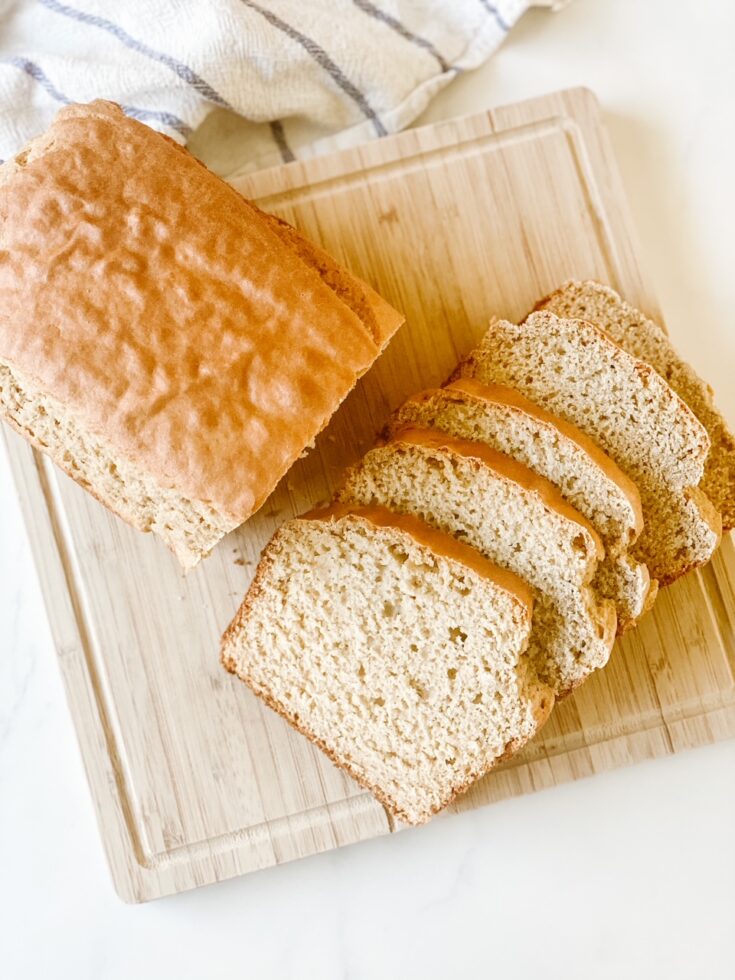
overhead shot of a loaf of homemade bread sliced on a wood cutting board with a white and blue striped dish towel in the background

Gluten Free Oat Flour Sandwich Bread | The Best Gluten Free Bread

overhead shot of half of a loaf of gluten free bread sliced on a wood cutting board with a marble backdrop and white and blue dish cloth

This gluten free oat flour sandwich bread will be your new go-to gluten free bread. With just a few simple ingredients you will have a loaf of bread ready to go in less than an hour.

Prep Time 5 minutes
Cook Time 45 minutes
Total Time 50 minutes

Ingredients

  • 2 3/4 cups gluten free oat flour
  • 2 tbsp raw honey
  • 1 cup raw milk
  • 3 eggs
  • 1/2 tsp sea salt
  • 1 tbsp baking powder
  • 1/2 tsp ground psyllium husk (optional)

Instructions

    1. Preheat the oven to 350 F.
    2. If making your own oat flour, measure out 3 cups of gluten free rolled oats and add to a high speed blender. Start by blending on low, and increasing the speed to high. You are looking for a very fine, powdery flour. This should give you 2 3/4 cups of oat flour.
    3. In a large bowl, whisk together the milk, eggs, and honey.
    4. Measure out the oat flour and add the the mixing bowl. Whisk together.
    5. Add in the salt and baking powder and whisk again. If using psyllium husk, add it in this step.
    6. Line a loaf pan with parchment paper. Pour in the batter.
    7. Bake for 45 minutes until golden.
    8. Cool completely before slicing. Overnight is best.

Pin It For Later

OAT FLOUR BREAD SLICED ON A WOOD CUTTING BOARD TEXT OVERLAY FOR PINTEREST GRAPHIC

More Posts You Will Love

Cinnamon Oat Flour Coffee Cake

Zucchini Oat Flour Muffins

Oat Flour Banana Bread

DIY Natural Glass Cleaner | Homemade Glass Cleaner

DIY Natural Glass Cleaner | Homemade Glass Cleaner

Learn how to make DIY Natural Glass Cleaner at home. Homemade, non-toxic glass cleaner recipe using only 3 ingredients. As an Amazon Associate I make a small commission at no extra cost to you. See my full disclosure here. Getting started with natural products in your…

8 Easy Meal Prep Tips | Practical Meal Prep

8 Easy Meal Prep Tips | Practical Meal Prep

Save money and eat well by using these 8 easy meal prep tips. Practical tips to help you save money and time. This post contains affiliate links, which means I make a small commission at no extra cost to you. See my full disclosure here. When…

100 Ways To Use The Top 10 Essential Oils

100 Ways To Use The Top 10 Essential Oils

Learn 100 ways to use the top 10 essential oils. Essential oils are a great way to ditch toxins in your home and begin a natural living journey.

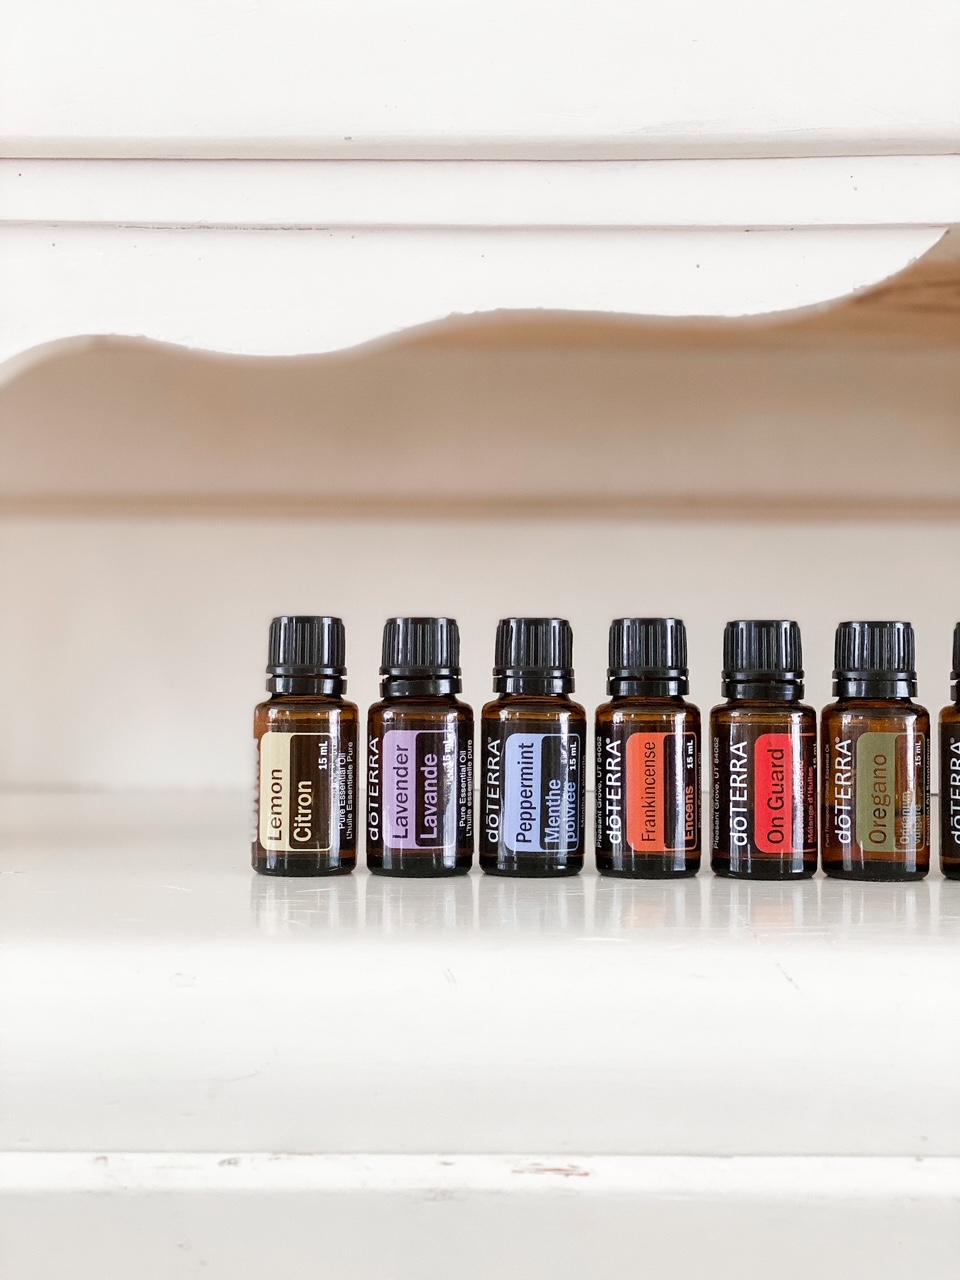
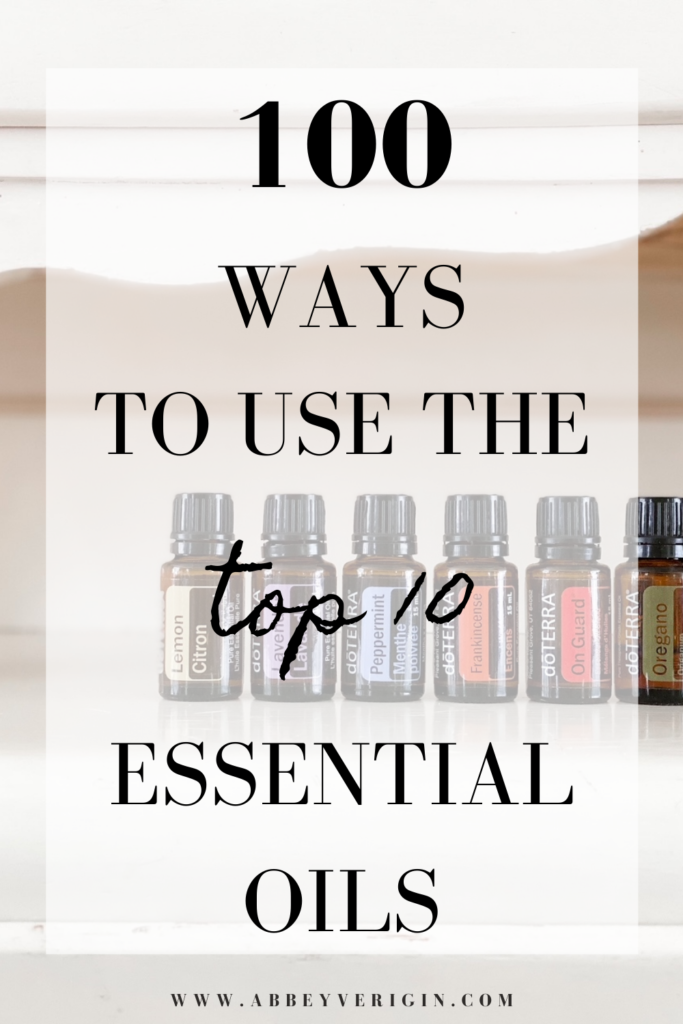
doterra essential oils lined up on a cream colored hutch

This post contains affiliate links, which means I make a small commission at no extra cost to you. See my full disclosure here.

It has been over 6 years now that I have been using essential oils in my day to day life. When I first got started with essential oils I was very particular when it came to making a decision on which company to purchase from. From the sourcing to the unmatched quality, Doterra was without a doubt the only choice for me. You can learn more about my decision to use Doterra here.

When people begin using essential oils, I often hear that they aren’t quite sure where to start or how they will be able to incorporate essential oils into their daily life. I have compiled 10 ways I use 10 of the most popular essential oils to hopefully help you get started on your journey!

Essential oils can be used aromatically, topically, or internally. Please note, quality is so important when it comes to essential oils as they are very poorly regulated! It is so important to know that you are purchasing high quality oils, as well as how to use them safely.

Aromatic Use

Aromatic use is by far the most popular way to utilize essential oils. Of course aromatic use of essential oils smells nice, but it can also provide mood support, and many other benefits. There are many ways you can use essential oils aromatically, these are two of the most common ways:

Diffuser: Fill your diffuser with water. Add 1-4 drops of essential oil of your choice, and turn it on. I usually add 2 drops of essential oil, unless I am mixing a variety of oils. A little goes a very long way when you are using high quality oils!

Scent Tent: Add a drop of essential oil to the palm of your hands and rub together. Cup over your face and inhale deeply.

Topical Use

Topical use of essential oils is another common way to use them. Essential oils have low molecular weights and are lipid soluble which means it is easy for them to penetrate the skin.

When it comes to topical use, I highly recommend being cautious of which oils you are using topically, how you are using them, and who you are using them on. While Doterra essential oils are completely natural and of the highest quality, they are potent! Many oils should be diluted prior to topical application. Citrus oils should typically be avoided when it comes to topical use as they are photosensitive, and your skin could burn if exposed to sun. Other oils are hot and should not be applied topically, or need to be heavily diluted. Oils should never be used in the ears, eyes, or nose.

When it comes to topical application, you will typically apply the oils directly where you would like to see the result. For muscle aches, apply deep blue. For a headache, peppermint to the temples or back of neck.

Doterra essential oils are very potent so I always recommend diluting oils, but this is especially important when it comes to using essential oils with children. Here is a great reference post on essential oil safety. As a starting point, dilute 1:5 essential oil to carrier oil. For young children, dilute further with a ratio of 1:10 essential oil to carrier oil.

Always keep a carrier oil like fractionated coconut oil nearby when using essential oils. If too much is applied or a reaction is formed, you can easily dilute the oil by adding a carrier oil.

Internal Use

When it comes to using essential oils internally, caution needs to be used. I can say with confidence that Doterra is the only brand of essential oil that I am comfortable taking internally, and even then, I do so sparingly.

Occasionally as needed I will take a drop of on guard or oregano essential oil in a veggie cap to support immune function. I love to add a drop of peppermint to my favorite brownie or cookie recipe.

Please note, I do not recommend internal use of essential oils from other companies. Every bottle of essential oil from Doterra goes through rigorous testing, with those lab tests available to the consumer.

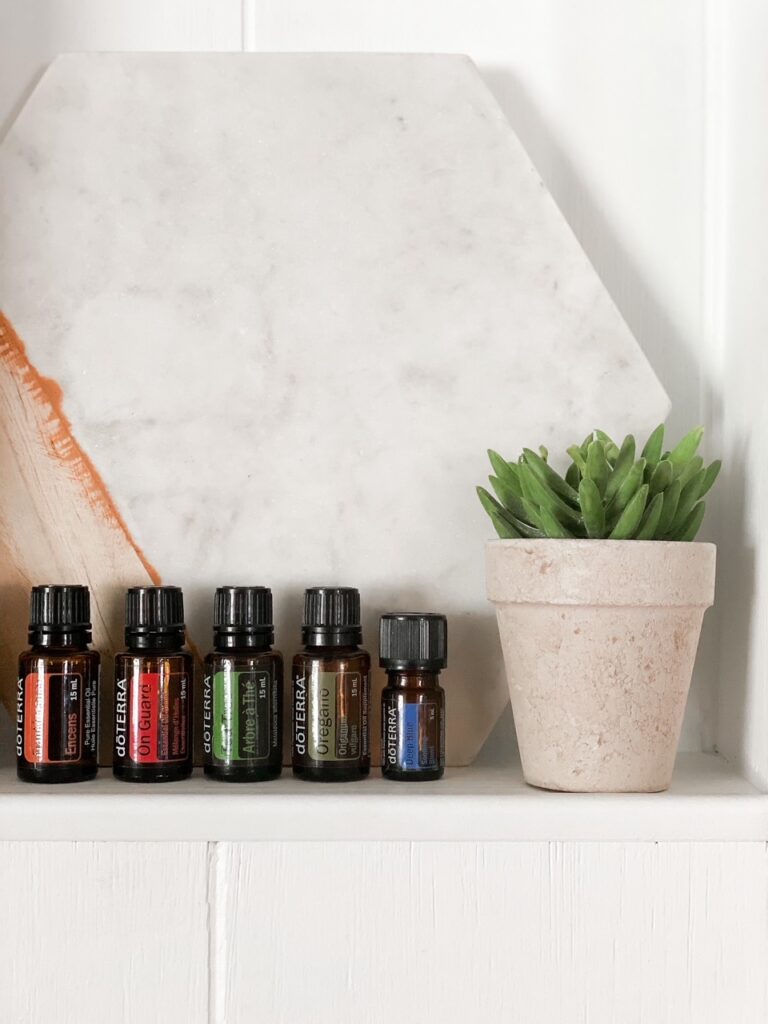
essential oils lined up on wall shelf with a succulent and a marble and wood board

Lemon Essential Oil Uses

Lemon is super versatile and has multiple benefits and uses. It has a high limonene content and has purifying and cleansing properties.

  1. Remove sticky residue by adding a drop of lemon and rubbing away.
  2. Add to a spray bottle with vinegar and filtered water for an easy DIY surface cleaner.
  3. Diffuse lemon, lavender, and peppermint for season relief.
  4. Add a few drops of lemon to the washing machine after it is filled to help with musty smelling laundry.
  5. Put a drop of lemon on a cotton ball or small piece of paper towel and add it to the bottom of the garbage can to keep it smelling fresh.
  6. Add 5 drops of lemon to a spray bottle and top off with vinegar for a natural glass cleaner.
  7. Add 10 drops of lemon to a spray bottle filled with half filtered water and half vinegar for a natural surface cleaner.
  8. Freshen and neutralize the air by diffusing lemon by itself.
  9. Add a drop of lemon to your soap when washing dishes which will help cut grease.
  10. Make a natural produce wash. Mix together a cup of vinegar, 1/4 cup of baking soda, and 2 drops of lemon in a clean sink or bowl and allow produce to soak before rinsing well.

Lavender Essential Oil Uses

Lavender is another essential oil staple due to its versatility. Its calming and relaxing aroma promotes a peaceful environment. One of lavenders main constituents is linalool which possesses cleansing properties, promotes feelings of calmness and relaxation.

  1. Make a DIY Linen Spray to support restful sleep.
  2. Dilute a drop of lavender with coconut oil and apply to any skin irritations to help reduce swelling and redness. Expect relief from sun burns, razor burn, and more.
  3. Soothe itchy bug bites with lavender diluted in a carrier oil.
  4. If you burn yourself in the kitchen or using hot tools, lavender will be your best friend. Apply directly to help reduce redness and support pain management.
  5. Add 10 drops of lavender to a 10 ml roller bottle and dilute with carrier oil. Roll down the spine or along the bottoms of feet to support a deep nights sleep.
  6. Add 2 drops of lavender to a cup of epsom salts and add to a warm bath which helps to promote relaxation.
  7. Add 2 drops to wool dryer balls and then transfer your laundry to the dryer for a waste and toxin free alternative to dryer sheets.
  8. Diffuse lavender by itself to ease anxious or stressful feelings.
  9. Add 10 drops of lavender to a 10 ml roller bottle with 10 drops each of lemon and peppermint. Dilute with carrier oil and rub on the bottom of feet for season relief on the go.
  10. Add a drop of lavender to a small amount of carrier oil and rub behind the ears when experiencing earaches.

Peppermint Essential Oil Uses

The high menthol content of Doterra’s peppermint essential oil is what really sets it apart from other products. Peppermint helps to alleviate stomach upset and promotes healthy respiratory function.

  1. Cool down on a hot day by adding 5 drops to a 30ml spray bottle and top off with water.
  2. Dilute a drop in coconut oil and massage into the stomach to soothe digestive discomfort.
  3. Add a drop to your hands, then massage together, and inhale deeply for a quick pick me up.
  4. Dilute a drop in carrier oil and massage into skin for relief from occasional muscle or joint pain.
  5. Dilute a drop in carrier oil and massage into the back of the neck for relief from fever or hot flashes.
  6. Add a drop to your favorite brownie or hot chocolate recipe.
  7. Add a drop to a tube of your favorite lip gloss for natural plumping and a fresh scent.
  8. Diffuse peppermint alone to promote focus and concentration on the task at hand.
  9. Apply peppermint to the chest, bottoms of feet, or the bridge of nose for respiratory support.
  10. Use peppermint as a natural bug repellant. Add 10 drops to a 30 ml spray bottle then top off with filtered water. Spray along windows and door ways to keep spiders, ants, and more away.

Oregano Essential Oil Uses

Oregano oil acts as a powerful cleansing agent and also offers powerful antioxidants. The primary chemical component of oregano is carvacrol which is a phenol that possesses antioxidant properties. Due to it’s high phenol content, caution should be taken when using oregano oil. Oregano essential oil is supportive to the immune system, and also promotes good digestive and respiratory function. Oregano oil is a hot oil, so it should not be applied topically without dilution. To take internally, always add oregano essential oil to a veggie cap first.

  1. Dilute 10 drops in a 10 ml roller bottle with carrier oil and apply to the bottoms of the feet for immune and respiratory support.
  2. Make a powerful immune support blend roller bottle with oregano, melaleuca, lemon, and on guard. Add 5 drops of each oil to a 10 ml roller bottle and top off with carrier oil. Rub into the bottoms of feet.
  3. Apply diluted to skin tags and warts.
  4. Oregano offers powerful antioxidants when ingested. Add 1 drop to a veggie cap and swallow with water to support immune function.
  5. Using a toothpick, add a small amount of oregano to your favorite dishes in place of fresh or dried. Oregano essential oil is extremely potent, so a little goes a very long way.
  6. Use topically on acne to promote healing. Dilute 10 drops of oregano in a 10 ml roller bottle with carrier oil.
  7. Carvacrol is a compound found in oregano that is a natural antibacterial. Add 10 drops to a spray bottle with filtered water for a natural and effective surface cleaner.
  8. Add 10 drops of oregano to a 10 ml roller bottle and top off with carrier oil. Apply topically around nail beds then rub in for purification benefits.
  9. Keep pests and fungus out of your garden. Add 10 drops of oregano to a spray bottle and top off with filtered water. Spray around your flower or vegetable garden to keep pests and fungus at bay.
  10. Keep carrier oil nearby as oregano oil is a hot oil. Only a small amount is needed, but if you find yourself in a situation where too much is used add carrier oil to help dilute.

Frankincense Essential Oil Uses

Frankincense is referred to as “the king of oils”, and for good reason! It is rich in monoterpenes which give it a wide variety of benefits. Frankincense is known to support healthy cellular, immune, nervous, and digestive function. Its soothing and beautifying properties are well known for calming imperfections and rejuvenating the skin. Frankincense has been researched on its effect on brain tumors. A powerful oil that everyone should have in their home. Consider frankincense the swiss army knife of essential oils.

  1. Add a drop of frankincense to your hands, massage together, and rub over the heart. Frankincense is great for promoting positive mood and lessening anxious feelings.
  2. Apply to scars to reduce scar tissue and promote cellular regeneration.
  3. Add 5 drops each frankincense, peppermint, and lavender to a 30 ml spray bottle. Top off with filtered water and use as a soothing after sun spray.
  4. Add 5 drops each frankincense, melaleuca, and lavender for a 10 ml spray bottle and top off with carrier oil. Apply to cuts, scrapes, and bruises to promote healing.
  5. Massage a drop of frankincense into the bottom of feet for immune support.
  6. Mix a drop of frankincense into your face moisturizer to promote youthful, radiant skin. It will also help to reduce the appearance of blemishes and rejuvenate the skin.
  7. Frankincense can be helpful in reducing head tension. Apply a drop to the a finger and press into the roof of the mouth. Alternatively, massage into the temples, back of neck, and forehead.
  8. Massage a drop of frankincense into the chest for respiratory support.
  9. Frankincense can help to soothe agitated muscles and tissues.
  10. Frankincense is a powerhouse oil. It can help to boost the power of other essential oils. Add frankincense into your other oil blends!

Tea Tree/Melaleuca Essential Oil Uses

Tea Tree, also known as Melaleuca, has cleansing and purifying properties. It can be used on minor skin irritations to help soothe and promote healing. It can also promote good immune function.

  1. Add a drop of tea tree to your facial cleanser to boost its power. Tea tree oil has long been used to address skin issues.
  2. Mix a couple of drops with 2 tablespoons of epsom salts. Add to a foot bath with a splash of apple cider vinegar to help fight fungal infections.
  3. Diffuse alone to help purify and cleanse the air of your home.
  4. Add 10 drops to a 10 ml roller bottle and dilute with carrier oil. Apply topically as a spot treatment for breakouts.
  5. Make a cleaning paste for the sink, bathtub, stove top, or oven with 1/2 cup of baking soda, 1 tablespoon of castile soap, and 5 drops of tea tree oil.
  6. Add a few drops of tea tree to your hair brush or shampoo and conditioner to keep lice away.
  7. Put 1-2 drops on the inside of the toilet paper roll in the bathroom to keep it smelling fresh.
  8. Make a homemade deodorant with baking soda, arrowroot powder, coconut oil, and tea tree oil. Tea tree oil is a natural antifungal and antimicrobial.
  9. Make a DIY countertop cleaner in a spray bottle with 15 drops tea tree oil, 1 cup vinegar, and 1 cup filtered water.
  10. Add 2 drops of tea tree oil to a tablespoon of castile soap and warm water. First soak your makeup brushes and then wash clean. The antifungal and antimicrobial properties will help to keep your brushes clean and your skin clear.

On Guard Essential Oil Uses

On Guard is a blend specifically designed by Doterra to protect against seasonal and environmental threats. The essential oils in this blend are known for their positive impact on immune function. When diffused, On Guard helps to purify the air and supports respiratory function.

  1. Diffuse to support the immune system when seasonal threats are present.
  2. Add 10 drops to a spray bottle with half vinegar and half filtered water for a natural, immune supportive surface cleaner.
  3. Add 10 drops to a roller bottle and dilute with carrier oil and roll on the bottoms of feet for immune support.
  4. Make a homemade hand cleansing spray by adding 10 drops of on guard to a 30 ml spray bottle with 1/2 tsp of fractionated coconut oil. Top off with half filtered water and half isopropyl alcohol.
  5. Add a drop of on guard to an ounce of filtered water and gargle to support dental health.
  6. When mopping or steam cleaning floors, add a few drops to the mop water or the mopping pad.
  7. Make a homemade immune supporting foaming hand soap. Fill a foaming hand soap container 1/3 way full with castile soap, add 10 drops of on guard, and top off with filtered water. Shake well.
  8. Open a bottle of on guard and place on your cutting board before you begin to cut onions. You will be blown away by how well this helps keep the tears at bay!
  9. Keep pests away from your household plants. Simply add 10 drops of on guard to a 500 ml/16 oz spray bottle and top off with filtered water. Spritz occasionally.
  10. Add a drop to your laundry detergent before a load to boost cleansing powers and leave your laundry smelling great.

Easy Air/Breathe Essential Oil Uses

Easy Air, also known as Breathe, is a blend of essential oils for respiratory support. It helps to support respiratory function when season threats are high and helps to soothe the airways and promote clear breathing.

  1. Diffuse during times of seasonal respiratory discomfort for a more restful sleep.
  2. Add a drop to a bowl of hot water, place a towel over your head and inhale for respiratory support and to reduce the effects of seasonal threats.
  3. Rub a drop of easy air over your chest before working out to help open airways.
  4. Use to make DIY Fabric Softener & Scent Booster for cozy and invigorating scented laundry without the synthetic fragrance.
  5. Make homemade shower melts. Mix together 1 cup of baking soda, 1/4 cup of filtered water, and 10 drops of easy air. Form into small discs. Place at the bottom of the shower for an invigorating experience that helps open up the airways.
  6. Add 10 drops of easy air to a 10 ml roller bottle and top off with carrier oil. Rub into the bridge of the nose to help reduce congestion.
  7. Add a few drops to a cotton ball and place near the air vents in your car to freshen stale air.
  8. Diffuse together a drop each of easy air, lemon, lavender, and peppermint to support your body in the presence of allergens.
  9. Add a drop to a warm wash cloth to use as a hot compress.
  10. Inhale deeply from the bottle during times of emotional stress.

ZenGest/DigestZen Essential Oil Uses

Zengest, also known as DigestZen, is known as Doterra’s “tummy tamer” blend because of its ability to aid in digestion, soothe stomach upset, and support digestive health as a whole. This powerful blend can be used to ease stomach discomfort, motion sickness, and indigestion. It is also supportive of a healthy gastrointestinal tract.

  1. Digestive discomfort or tummy aches? Take a drop of zengest in carrier oil and massage onto your stomach.
  2. Feeling queasy? Breathe zengest in deeply when experiencing motion sickness or nausea.
  3. Ate too much or something that didn’t sit well? Rub a drop of zengest into the abdomen.
  4. Add 10 drops of zengest to a 10 ml roller bottle and top off with carrier oil. Roll onto stomach and lower back if experiencing gas or bloating.
  5. Massage a drop into the bottoms of feet to ease feelings of nervousness.
  6. Zengest can be rubbed along the bridge of the nose when experiencing congestion.
  7. Massage a drop of zengest into the big toe to support respiratory health.
  8. Add a drop to a veggie cap and swallow with water for digestive support.
  9. Massage a drop into your temples to reduce tension.
  10. Add a drop of zengest to a small glass of water and drink 30 minutes before meal time to promote health digestion.

Deep Blue Essential Oil Uses

Deep Blue is the go to when it comes to sore muscles and joints. This oil is fast and effective to work on aches and pains. This oil is not to be used internally.

  1. Dilute a couple of drops of deep blue into some carrier oil and massage in to ease muscle tension.
  2. Add a drop of deep blue to a small amount of coconut oil and massage into lower abdomen to ease menstrual cramps.
  3. Support localized blood flow by massaging a drop of deep blue diluted in carrier oil following an injury.
  4. Working at a computer all day? Rub a drop of deep blue diluted in carrier oil into the back of the neck and shoulders.
  5. Massage into the body with lotion or carrier oil prior to stretching or yoga to promote relaxation and provide a cooling sensation.
  6. Dilute 10 drops of deep blue in a 10 ml roller bottle with carrier oil. Apply to the back of the neck, temples, or forehead to ease tension headaches.
  7. After a long walk or hike using lotion massage a drop of deep blue into your feet.
  8. Take a bottle of deep blue along to your next appointment with a massage therapist.
  9. Apply a drop of deep blue diluted in carrier oil to joints and chest pre workout for an invigorating exercise blend.
  10. Add a drop of deep blue to your favorite hand lotion to use at the end of a long work day.

Pin It For Later

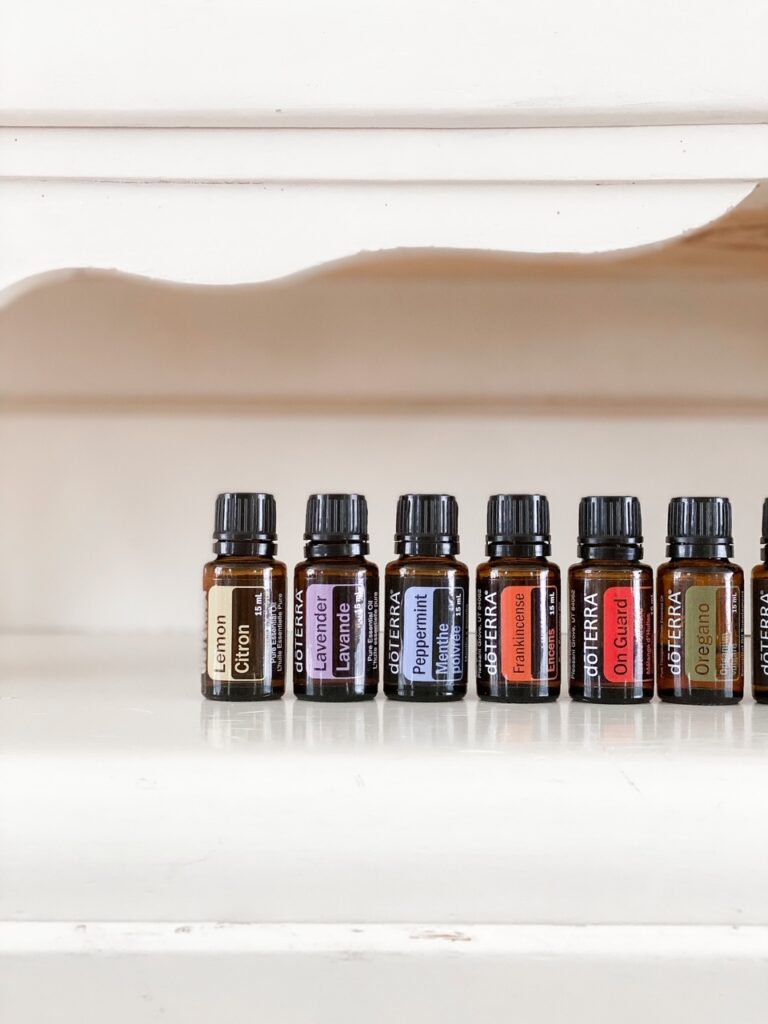
pinterest graphic 100 ways to use the top 10 essential oils bottles on a cream colored hutch

Other Posts You Will Love

Why I Chose Doterra Essential Oils

Five Ways To Reduce Toxins In Your Home Now

How To Make Bone Broth In The Instant Pot

How To Make Bone Broth In The Instant Pot

Learn how to make bone broth in the instant pot. Bone broth is nourishing, mineral rich, and packed full of gut healing benefits. It is also the perfect way to support the immune system. This post contains affiliate links, which means I make a small…


Privacy Policy